You’ll be able to apply what you learn to any web application.

Introduction
Here is the definition of Selenium given by their official website:
Selenium automates browsers.
That’s it. This is the most representative definition of what Selenium is. With this library, you’ll be able to control a web browser and interact with any websites. It was originally created to run tests on web applications you were developing but it can also be used as a web scraping tool or a way to create a bot.
In this article, we will see how to create a simple Instagram bot to show you what Selenium is capable of.
Why aren’t we using libraries like Scrapy or Requests to perform the actions required by our bot?
The reason is that Scrapy or Requests don’t perform very well with Javascript made websites. We use Selenium because of its ability to render a page using Javascript just like a normal browser such as Chrome or Firefox.
What are the functionalities we want to implement for our bot?
The goal of this article is to give you an overview of the possibilities given by Selenium, therefore, I won’t be able to show you how to code every action possible by our bot on Instagram, but with the knowledge you’ll acquire reading this article, you will be able to add the missing functionalities on your own. For now, our bot should be capable of the following actions:
- Sign in.
- Follow a user
- Unfollow a user
- Get a user’s followers
The architecture of the script
To keep our code organized and reusable in other projects, we will put our code in a class named InstagramBot. Every action the bot will be capable of doing will be a method.
class InstagramBot():
   def __init__
   def signIn
   def followWithUsername
   def unfollowWithUsername
   def getUserFollowers
   def closeBrowser
   def __exit__
Let’s get started
First, let’s install Selenium by simply running the command:
pip install seleniumOnce it’s done, create a file name main.py in the folder of your choice.
We’ll then need to import the webdriver object from Selenium in our script. This will allow us to control Chrome with our code.
The constructor will take the user’s mail and password as an argument. We also create our webdriver in this method and make it accessible to the rest of the class.
| from selenium import webdriver | |
| class InstagramBot(): | |
| def __init__(self, email, password): | |
| self.browser = webdriver.Chrome() | |
| self.email = email | |
| self.password = password | |
Note: If you don’t have Chrome installed on your machine or if webdriver.Chrome() throws an error, you need to download ChromeDriver from here. (Chose the one compatible with your Operating System). Then just pass the ChromeDrive’s path as the first parameter of the method. For example, if your OS is Windows and the ChromeDriver is in the same folder of your script:webdriver.Chrome('chromedriver.exe')
Now let’s define the signIn method. Our bot will have to access this URL https://www.instagram.com/accounts/login/ and complete the login form with the email and password initialized in the constructor.
If you inspect the page, you’ll notice that there are only two <input> available. The first one will always take the email and the second one the password.
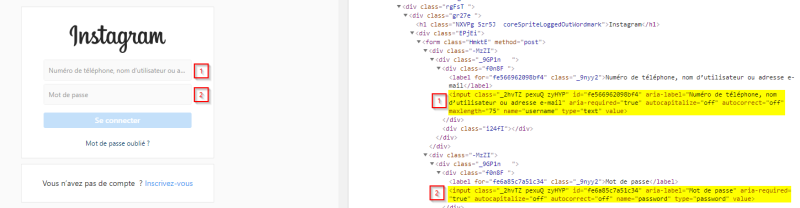
This means we can select those two inputs with:
| emailInput = self.browser.find_elements_by_css_selector('form input')[0] | |
| passwordInput = self.browser.find_elements_by_css_selector('form input')[1] |
Then we simply have to complete them with the help of Selenium, so the form will be able to be sent. For that, we will make use of the .send_keys method.
| emailInput.send_keys(self.email) | |
| passwordInput.send_keys(self.password) |
Selenium will write the email and the password in the corresponding <input>.
Now the last thing we need to do is to send the form. We could select the button and simulate a click on it to accomplish that. But there is actually a shorter method: most of the forms can be sent pressing the ENTER key once an input is focused. This means that in our case we will simply say to Selenium to hit the ENTER key after writing in the password field.
| import time | |
| from selenium.webdriver.common.keys import Keys | |
| # ... | |
| def signIn(self): | |
| self.browser.get('https://www.instagram.com/accounts/login/') | |
| emailInput = self.browser.find_elements_by_css_selector('form input')[0] | |
| passwordInput = self.browser.find_elements_by_css_selector('form input')[1] | |
| emailInput.send_keys(self.email) | |
| passwordInput.send_keys(self.password) | |
| passwordInput.send_keys(Keys.ENTER) | |
| time.sleep(2) |
We completed the signIn method!
I took the liberty to add time.sleep(2) at the end of the method. Like this, you’ll have a bit of time to see what’s going on when the script is running.
So far, our code should look something like this:
| from selenium import webdriver | |
| from selenium.webdriver.common.keys import Keys | |
| import time | |
| class InstagramBot(): | |
| def __init__(self, email, password): | |
| self.browser = webdriver.Chrome() | |
| self.email = email | |
| self.password = password | |
| def signIn(self): | |
| self.browser.get('https://www.instagram.com/accounts/login/') | |
| emailInput = self.browser.find_elements_by_css_selector('form input')[0] | |
| passwordInput = self.browser.find_elements_by_css_selector('form input')[1] | |
| emailInput.send_keys(self.email) | |
| passwordInput.send_keys(self.password) | |
| passwordInput.send_keys(Keys.ENTER) | |
| time.sleep(2) |
You can already test it by adding the following lines at the end the file (do not add it inside the class!)
bot = InstagramBot('youremail', 'yourpassword')
bot.signIn()
Let’s open our terminal and run the following command:
python main.pyA new instance of Chrome should open the Instagram login page. The inputs should be completed and after a couple of seconds, you should be redirected to your home page.
Note: Instagram is a complex web application. It is completely possible that after your login, instead of directing you to your home page, Instagram would display a page asking you if you want to download their mobile application. It is also possible that you end up on another page containing another form asking you to confirm your identity. I won’t cover those possibilities in this article to keep it short. But I invite you to implement your own solutions as an exercise.
Let’s follow people
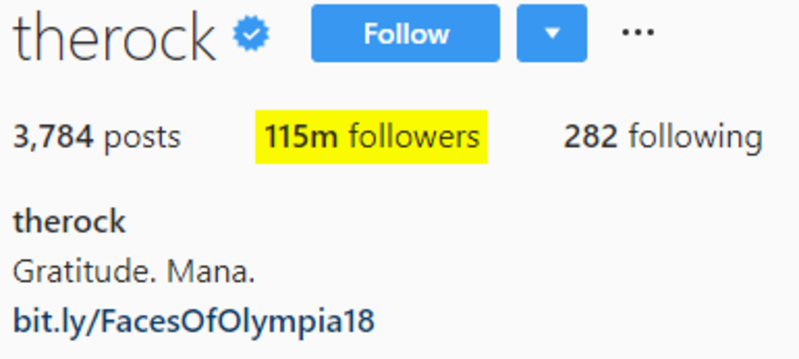
If you want to follow a user on Instagram, the most common way is to go on their page and to click on the “Follow” button.
If we inspect the page, we notice that there are three different buttons on it and the “Follow” one is the first in the list.
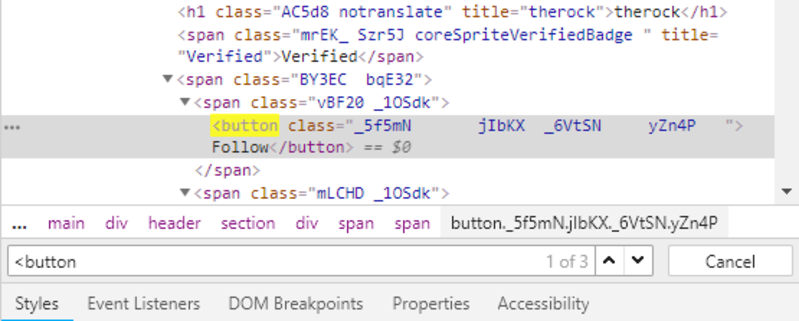
We can conclude that the “Follow” button can be selected with the following code:
| followButton = self.browser.find_element_by_css_selector('button') |
Note: Notice that there are two methods to select elements with a CSS selector:
- .find_element_by_css_selector()
- .find_elements_by_css_selector()
The first one will return the first element corresponding to our search on the page. The second one will return all the elements found on the page in an array.
With that information, let’s start to implement our followWithUsername method.
The method takes the username of the person we want to follow as an argument. Then we tell Selenium to go on the person’s page, select the “Follow” button and click on it.
| def followWithUsername(self, username): | |
| self.browser.get('https://www.instagram.com/' + username + '/') | |
| time.sleep(2) # not necessary | |
| followButton = self.browser.find_element_by_css_selector('button') | |
| followButton.click() | |
There is still an issue with this method: if we are already following someone, Selenium will still go on that person’s page and click on the first button it will find.
In that case, the first button found is the “Following” button. If we click on it, Instagram will display a modal asking use if we want to unfollow the person. That is not optimal. We can refactor our followWithUsername method by checking if the button text is not equal to “Following” before clicking on it.
| def followWithUsername(self, username): | |
| self.browser.get('https://www.instagram.com/' + username + '/') | |
| time.sleep(2) | |
| followButton = self.browser.find_element_by_css_selector('button') | |
| if (followButton.text != 'Following'): | |
| followButton.click() | |
| time.sleep(2) | |
| else: | |
| print("You are already following this user") |
This concludes our followWithUsername method… or maybe not? If you’re having your browser or your operating system’s language set as something else than English, you might encounter some issues: when you open Instagram, they might display the pages in your default language. The condition followButton.text != 'Following' will always return true.
To fix this issue, we can configure our webdriver so it will always use English as the default language. Instagram’s interface will always contain the same text. To apply that, we will make use of the chrome_options argument in the webdriver.Chrome() method. Here is how our refactored __init__ method looks like:
| def __init__(self, email, password): | |
| self.browserProfile = webdriver.ChromeOptions() | |
| self.browserProfile.add_experimental_option('prefs', {'intl.accept_languages': 'en,en_US'}) | |
| self.browser = webdriver.Chrome('chromedriver.exe', chrome_options=self.browserProfile) | |
| self.email = email | |
| self.password = password |
On the second line, we set up a new variable containing empty ChromeOptions. On the next line, we specify that our language is English. We then just have to pass the argument chrome_options, when we initializewebdriver.Chrome() . With that fix, we have the guarantee that the page we load will always be in English.
Unfollow Method
To implement the unfollowWithUsername method, we can take the followWithUsername method as an example. The beginning is the same: we go to the user’s page and click on the first button.
Except that this time, a modal will open to ask a confirmation.
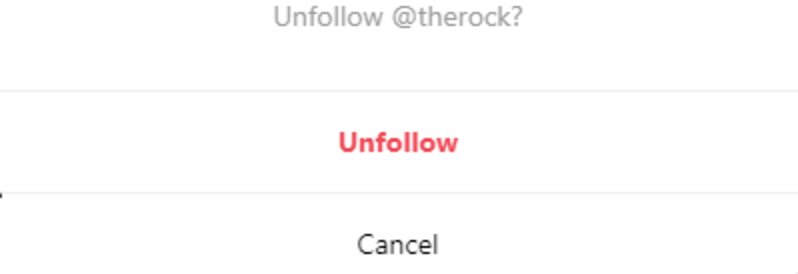
We need to click on the “Unfollow” button to complete the action. In this situation, we will make use of the XPath selector instead of the usual selector. This method makes it easier to look for elements when our selection depends on their text.
| def unfollowWithUsername(self, username): | |
| self.browser.get('https://www.instagram.com/' + username + '/') | |
| time.sleep(2) | |
| followButton = self.browser.find_element_by_css_selector('button') | |
| if (followButton.text == 'Following'): | |
| followButton.click() | |
| time.sleep(2) | |
| confirmButton = self.browser.find_element_by_xpath('//button[text() = "Unfollow"]') | |
| confirmButton.click() | |
| else: | |
| print("You are not following this user") |
As you can see, this works the same way we’re used to: we select an element with the XPath selector and we simulate a click on it.
You can test the two methods we just created by using this code after the class :
bot = InstagramBot('youremail', 'yourpassword')
bot.signIn()
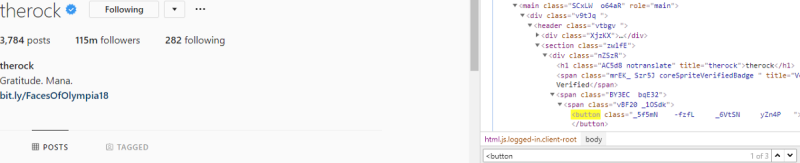
bot.followWithUsername('therock')
bot.unfollowWithUsername('therock')This should open Chrome, login to Instagram, follow “The Rock” and unfollow him.
Our last feature: get a list of a user’s followers
Let’s start the implementation of the getUserFollowers method. It will take two arguments: the target’s username and the number of follower’s links we want to fetch.
To achieve such thing on a real browser, we would have to navigate to the user’s profile and click on the “x followers” element.
Instagram then opens a modal with the followers’ list.
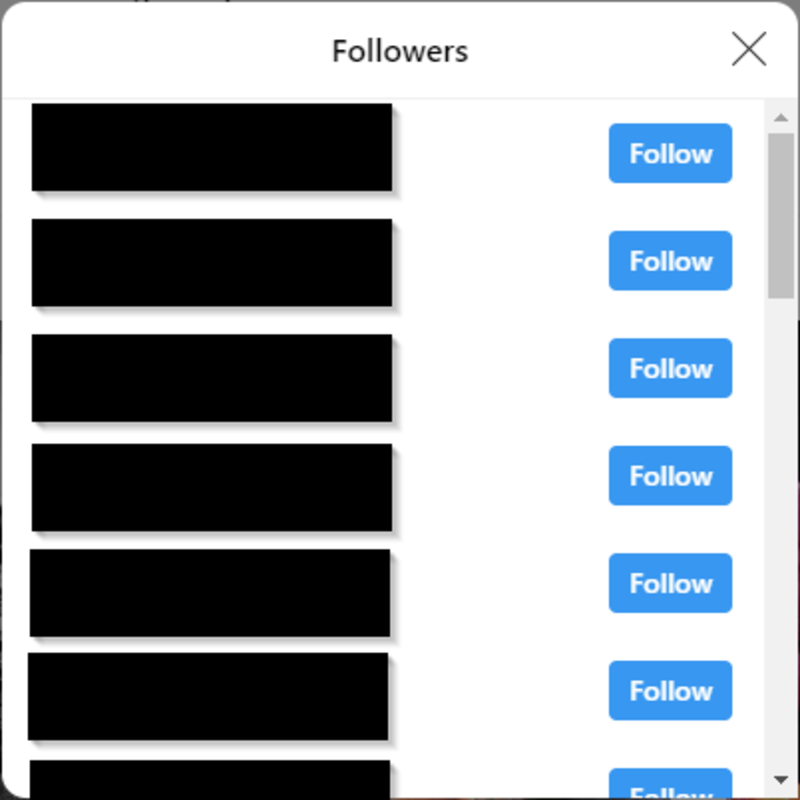
The list contains only a dozen users. You can only get more by scrolling down.
You can apply the same steps with Selenium:
| def getUserFollowers(self, username, max): | |
| self.browser.get('https://www.instagram.com/' + username) | |
| followersLink = self.browser.find_element_by_css_selector('ul li a') | |
| followersLink.click() | |
| time.sleep(2) | |
| followersList = self.browser.find_element_by_css_selector('div[role=\'dialog\'] ul') | |
| numberOfFollowersInList = len(followersList.find_elements_by_css_selector('li')) | |
| followersList.click() | |
| actionChain = webdriver.ActionChains(self.browser) | |
| while (numberOfFollowersInList < max): | |
| actionChain.key_down(Keys.SPACE).key_up(Keys.SPACE).perform() | |
| numberOfFollowersInList = len(followersList.find_elements_by_css_selector('li')) | |
| print(numberOfFollowersInList) | |
| followers = [] | |
| for user in followersList.find_elements_by_css_selector('li'): | |
| userLink = user.find_element_by_css_selector('a').get_attribute('href') | |
| print(userLink) | |
| followers.append(userLink) | |
| if (len(followers) == max): | |
| break | |
| return followers |
Let’s break down the code to understand what’s happening:
| self.browser.get('https://www.instagram.com/' + username) | |
| followersLink = self.browser.find_element_by_css_selector('ul li a') | |
| followersLink.click() |
We navigate to the user’s profile page, locate the “x followers” button and simulate a click on it. The modal opens at this moment.
| followersList = self.browser.find_element_by_css_selector('div[role=\'dialog\'] ul') | |
| numberOfFollowersInList = len(followersList.find_elements_by_css_selector('li')) |
We select the modal on the page and count how many followers are in the list. To select those elements, I use the same strategies that I applied to the previous methods. There is just a small difference with the part div[role=\'dialog\'] ul . We say to Selenium to select the <ul> inside a <div> with a “role” attribute equal to “dialog”. We’re using the backslash so that Python doesn’t think the string ends here. time.sleep() is required there otherwise, our script will try to select the element before it renders and throw an error.
The click on the modal ( followersList.click() ) will “focus” it and allow us to use the SPACE key to scroll down.
| actionChain = webdriver.ActionChains(self.browser) | |
| while (numberOfFollowersInList < max): | |
| actionChain.key_down(Keys.SPACE).key_up(Keys.SPACE).perform() | |
| numberOfFollowersInList = len(followersList.find_elements_by_css_selector('li')) | |
| print(numberOfFollowersInList) |
In this part, we define an actionChain. ActionChains basically allow us to execute a list of actions (press a key, move the mouse, etc.) in a precise order. Here we say to our script: as long as the number of followers in the list is lower than the number required, press SPACE. After each press, we refresh the number of users we have in the list and print it. (The print is not necessary here. It’s just a good way to have a visual check of the bot’s progress.).
Note: .perform() is added at the end of the actions so the events are fired in the order they are queued up.
| followers = [] | |
| for user in followersList.find_elements_by_css_selector('li'): | |
| userLink = user.find_element_by_css_selector('a').get_attribute('href') | |
| print(userLink) | |
| followers.append(userLink) | |
| if (len(followers) == max): | |
| break | |
| return followers |
The last part of the method is quite straightforward. Once the users’ list is larger than the required number, we loop through the whole list, extract the profile’s link, append it to a new list and return the full list once we reach the required number. Again, the print is not necessary and it is just here to check the progress of the script.
This ends our getUserFollowers method. Let’s test it by adding those lines after the class declaration:
print(bot.getUserFollowers('therock', 50))This should print the list of 50 followers of The Rock.
Clean up!
We just have to add two methods to clean up our script after the execution and destroy the browser’s instance that we used.
| def closeBrowser(self): | |
| self.browser.close() | |
| def __exit__(self, exc_type, exc_value, traceback): | |
| self.closeBrowser() |
This part just makes sure that self.browser.close() is called when the script stops running.
Here is the full code in case you need it:
| from selenium import webdriver | |
| from selenium.webdriver.common.keys import Keys | |
| import time | |
| class InstagramBot(): | |
| def __init__(self, email, password): | |
| self.browserProfile = webdriver.ChromeOptions() | |
| self.browserProfile.add_experimental_option('prefs', {'intl.accept_languages': 'en,en_US'}) | |
| self.browser = webdriver.Chrome('chromedriver.exe', chrome_options=self.browserProfile) | |
| self.email = email | |
| self.password = password | |
| def signIn(self): | |
| self.browser.get('https://www.instagram.com/accounts/login/') | |
| emailInput = self.browser.find_elements_by_css_selector('form input')[0] | |
| passwordInput = self.browser.find_elements_by_css_selector('form input')[1] | |
| emailInput.send_keys(self.email) | |
| passwordInput.send_keys(self.password) | |
| passwordInput.send_keys(Keys.ENTER) | |
| time.sleep(2) | |
| def followWithUsername(self, username): | |
| self.browser.get('https://www.instagram.com/' + username + '/') | |
| time.sleep(2) | |
| followButton = self.browser.find_element_by_css_selector('button') | |
| if (followButton.text != 'Following'): | |
| followButton.click() | |
| time.sleep(2) | |
| else: | |
| print("You are already following this user") | |
| def unfollowWithUsername(self, username): | |
| self.browser.get('https://www.instagram.com/' + username + '/') | |
| time.sleep(2) | |
| followButton = self.browser.find_element_by_css_selector('button') | |
| if (followButton.text == 'Following'): | |
| followButton.click() | |
| time.sleep(2) | |
| confirmButton = self.browser.find_element_by_xpath('//button[text() = "Unfollow"]') | |
| confirmButton.click() | |
| else: | |
| print("You are not following this user") | |
| def getUserFollowers(self, username, max): | |
| self.browser.get('https://www.instagram.com/' + username) | |
| followersLink = self.browser.find_element_by_css_selector('ul li a') | |
| followersLink.click() | |
| time.sleep(2) | |
| followersList = self.browser.find_element_by_css_selector('div[role=\'dialog\'] ul') | |
| numberOfFollowersInList = len(followersList.find_elements_by_css_selector('li')) | |
| followersList.click() | |
| actionChain = webdriver.ActionChains(self.browser) | |
| while (numberOfFollowersInList < max): | |
| actionChain.key_down(Keys.SPACE).key_up(Keys.SPACE).perform() | |
| numberOfFollowersInList = len(followersList.find_elements_by_css_selector('li')) | |
| print(numberOfFollowersInList) | |
| followers = [] | |
| for user in followersList.find_elements_by_css_selector('li'): | |
| userLink = user.find_element_by_css_selector('a').get_attribute('href') | |
| print(userLink) | |
| followers.append(userLink) | |
| if (len(followers) == max): | |
| break | |
| return followers | |
| def closeBrowser(self): | |
| self.browser.close() | |
| def __exit__(self, exc_type, exc_value, traceback): | |
| self.closeBrowser() |
Conclusion
You saw the main features of Selenium. You now have the tools to create an automation system on any website. As an exercise, you can improve and add features to the code we just wrote.
Before developing your own bot, it is always good to have a look if the website you want to automate offers the possibility to be interacted with through its own official API. It can save you a lot of time and it’s usually simpler to use.
Disclaimer: don’t use your automation system to flood a website with requests. In the case of our Instagram bot, for example, don’t use it to follow hundreds of users per minute. Your account will definitely be banned if you do such thing.
Thank you for reading this article. As always, if you have questions, you can reach me on Medium or on Twitter.
I also wanted to thank you for all the support I received for my first article. This was unexpected and made me very happy! I hope you’ll enjoy this article as much as you did with the previous one!